Developer’s manual
This section of the documentation describes how to develop new features.
Graphical User Interfaces (GUIs)
In this section, we provide a few recipes that show how to implement features commonly found in GUI programs.
Creating new forms
A form is a window on the screen containing controls, called widgets. Striptease uses the PyQt bindings to the Qt library to show and manipulate forms.
As the visual layout of forms can be extremely complex, Qt provides a GUI tool to design and test forms, called Qt Designer. Although Qt Designer has been developed with C++ programmers in mind, it can be used to create forms to be used in Python programs too.
Here is a screenshot of Qt Designer:
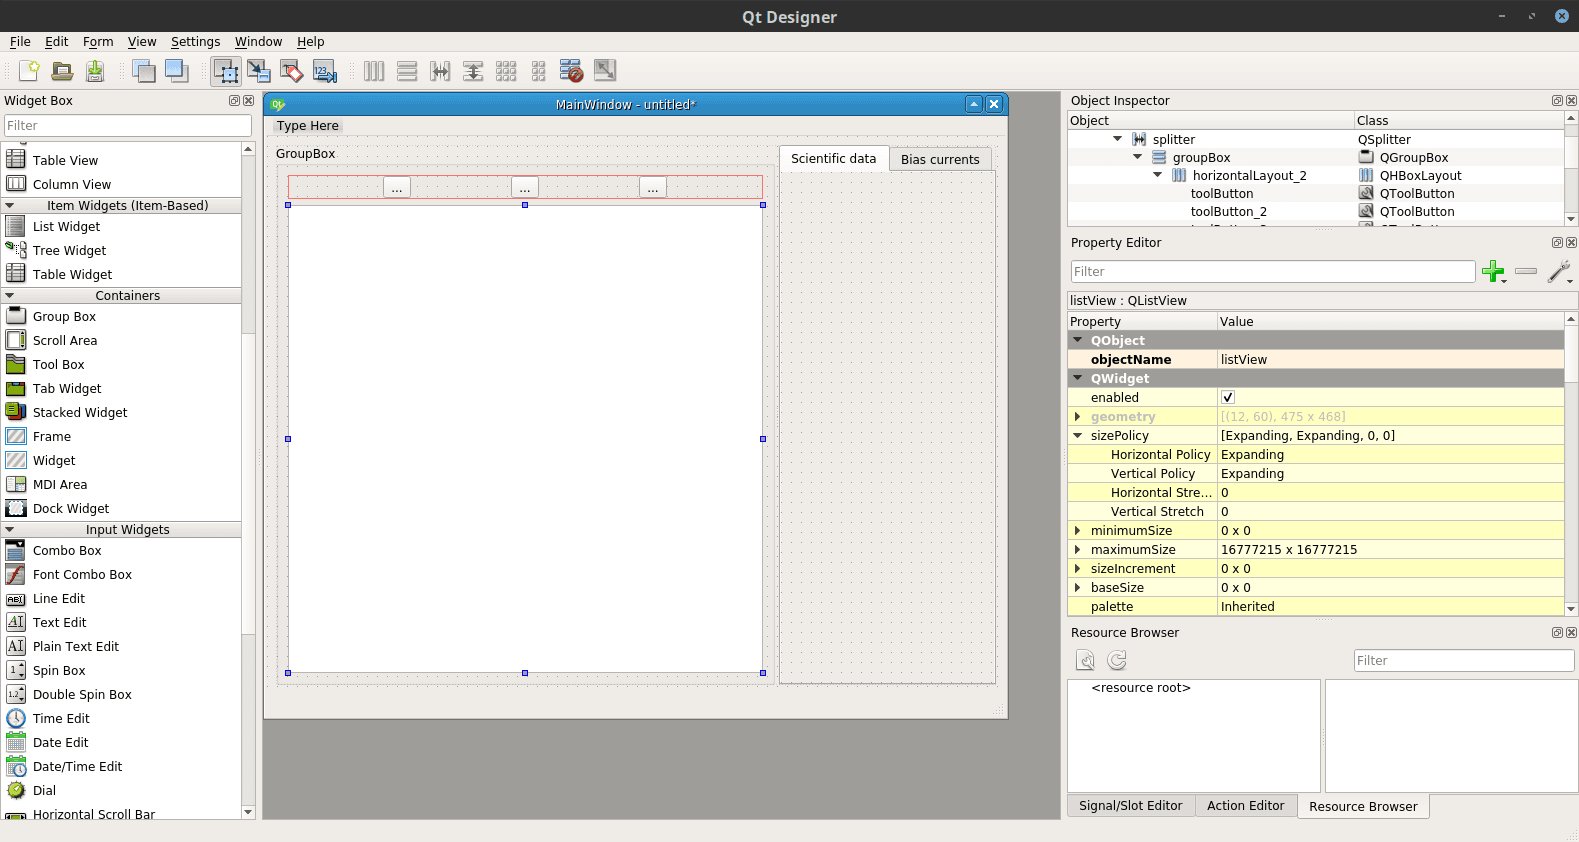
QT Designer 5.9
Using Websocket plots in forms
A common feature in Striptease programs is to show a real-time plot of
the data read from the electronic boards. Striptease provides a class,
widgets.plot.pol.PolMplCanvas, that helps in implementing
this kind of widget. Here we provide an explanation of how to use it
in forms designed with Qt Designer.
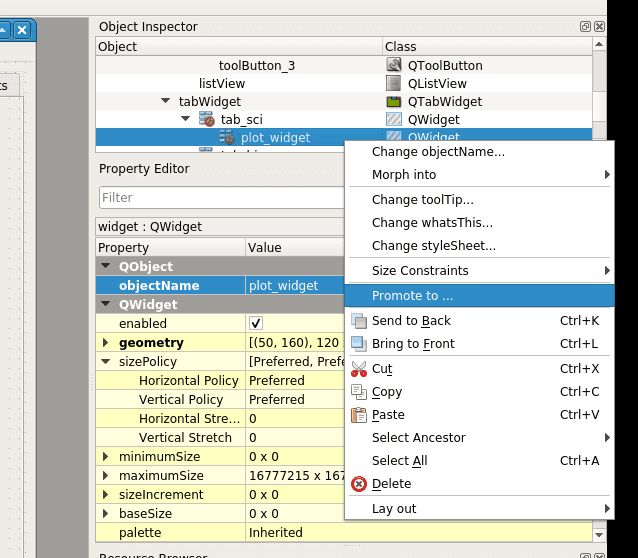
Once you have created a new form in Qt Designer, insert a plain Widget control in the form. This form is generic, i.e., it will be shown as a transparent rectangular surface: Qt Designer has no way to understand how it will appear once the program is completed.
We must however tell Qt Designer that this widget should be of the proper type. This is called promotion: select the new transparent widget and pick the entry «Promote to…» from the contextual menu under the object inspector, as shown in the following figure.
A new window will appear. This window contains all the custom widgets defined so far in Qt Designer, and it should be empty. Fill the fields with the following values:
- Base class name: leave as it is now (
QWidget); - Promoted class name: enter
PolMplCanvas(case is important!); - Header file: enter
widgets.plot.pol.h; - Global include: leave it blank.
The header file we have specified is widgets.plot.pol.h, which is
simply the Python module containing the definition for
PolMplCanvas, with a .h appended at the end. The .h
extension must be inserted because Qt Designer always thinks that
modules are defined in C++ header files; this extension will be
silently dropped once we load the form in our Python script.
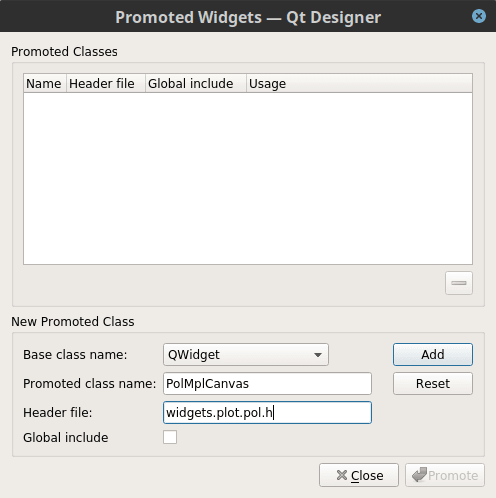
Once you have entered the values listed above, press Add; the new promotion should be added to the list Promoted classes:
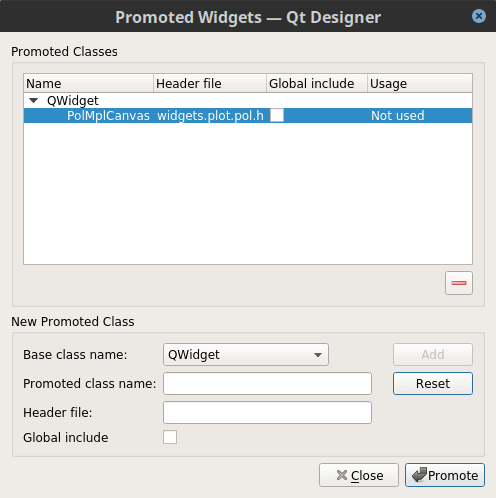
So far we have defined a promotion from a generic widget to a
widgets.plot.pol.PolMplCanvas, but we have not asked Qt
Designer to use it on our widget in the main form (see the text «Not
used» under the column Usage?). Just press the button Promote to
promote the widget.
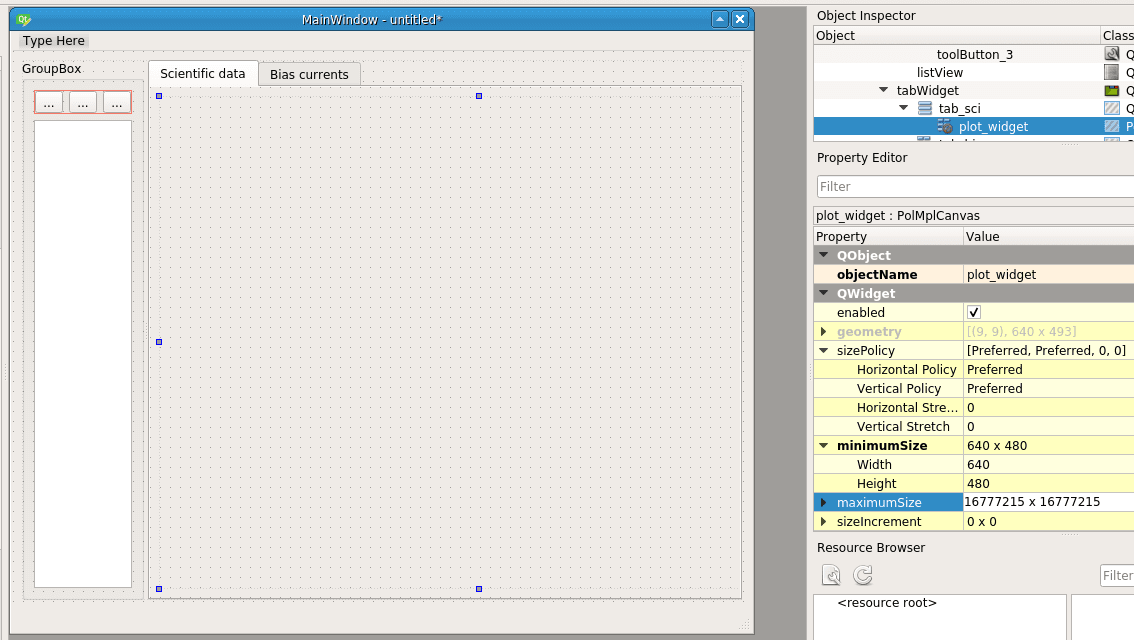
We need only one final touch. From the point of view of Qt Designer,
the widget is no longer a generic QWidget, but yet the program
does not know how to plot it. This means that the widget has no size,
and thus the scaling of the form might look weird when opened in Qt
Designer. To fix this, you can set the field minimumSize in the
Property Editor on the left. Setting it to 640×480 is usually fine: